

This information will show you how to move a website from cPanel to the un-managed server you’ve installed. The phrase “Server” here relates to either VPS or Dedicated server.
The main objective of this weblog is to show beginners how to handle un-managed servers.
I posted some basic tutorials on how to build and setup your own un-managed server either like LNMP on CentOS,working Debian server and basic Ubuntu setup.
Preparation before starting migration:
1. Make sure you have access to your old host with IP, username and password to login to your site’s cPanel.
2. I assume here that you have built and setup your own server and it is ready to host a website (it should already have a working web server, mail server, php5 and MySQL server).
3. In this tutorial I will use my server running CentOS.
4. Make sure you have proper knowledge to access your new server via SSH. In Windows, you can simply use Putty. Read my previous post about how to use Putty to SSH your server.
5. In this guide I will try to move a blog running WordPress CMS. This guide can be applicable to all kind of websites using MySQL database.
6. Also make sure to put your website to a frozen state or maintenance mode. This is quite necessary for your website users .I will not tell you how to do that as this can change according to the script your website is using. In WordPress, you can simply use a plugin called “code-freeze”
7. Before proceeding make sure, your new server is online and really ready to host your website.
8. Also, make sure your domain name still resolving to old host not to the new server. You better can change your domain’s NS record later after the website migration completed.
The website Migration process:
Step 1 – First, we have to find a way to transfer all files from your old host to your new server. There are two main ways you can use to complete this process: First, by creating full backup of your website files; Secondly, you can use ftp and let your new server to access all files in old host. Whatever the way you will use,simply login to your old host cPanel area.
These earlier steps we are using the first manual way. You will also find the Alternative way to move files so keep reading.
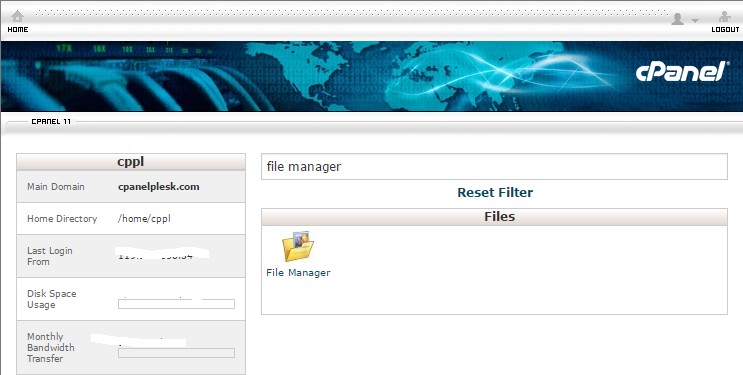
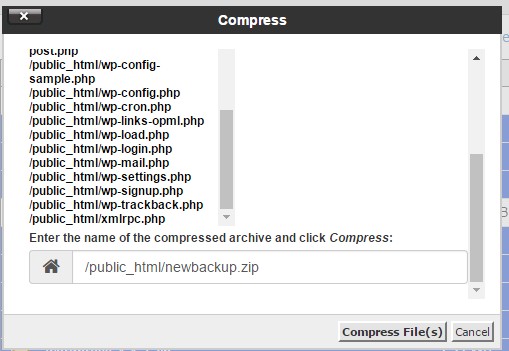
Step 2 – Here you will create backup of all your files. In cPanel, launch “File Manager”.
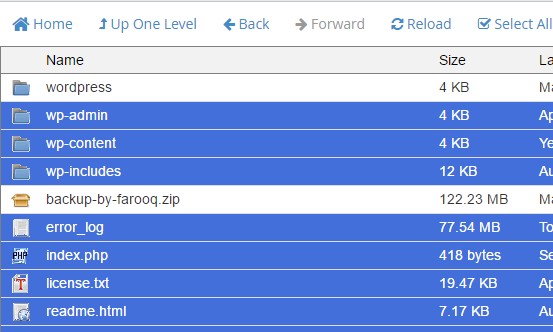
Step 3 – Next, go to your cPanel’s File Manager and click “Select All” option. Optionally, you can also exclude files/folders from backup by pressing and holding Control key on your keyboard then click on files / folders you wish to exclude.
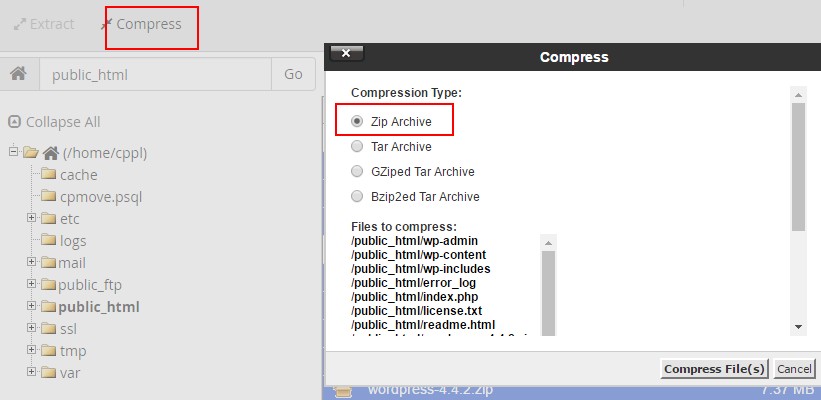
Step 4 – Once done, hit the “Compress” icon then choose “zip archive” in Compression Type. Once done, give the backup file a name then hit the “Compress Files” button.Wait for it to finish. It depends on size no of the files you have.
In this example my backup file name is “newbackup.zip”.
Step 5 – Login to your new server via SSH.It is recommended to login to your new server with root privilege.
Step 6 – In your new server, go to the root folder of your site’s document. It usually is “var/www/domain.com/public_html”
cd /var/www/cpanelplesk.com/public_html
Step 7 – Now it’s time to download the backup file you’ve created. Use the “wget” command:
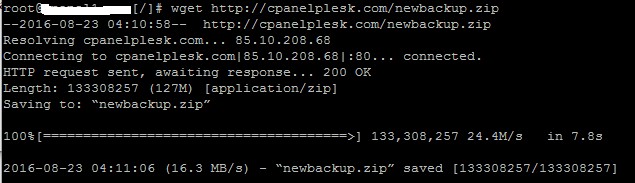
wget http://domain.com/path/to/file.zip
example:
wget http://cpanelplesk.com/newbackup.zip
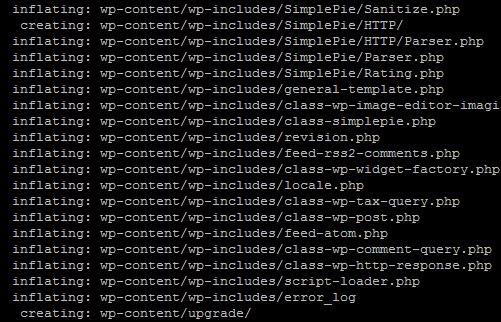
Step 8 – So all your files have been transferred to the new server. Now all you have to do is extracting the backup file using unzip command.
unzip newbackup.zip
Command output will be like this:
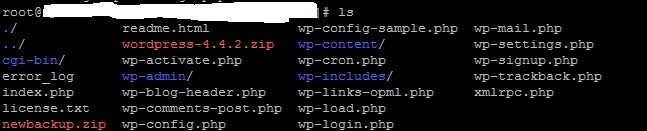
Once done, you can check all files and folders list by typing “ls” command then hit Enter.
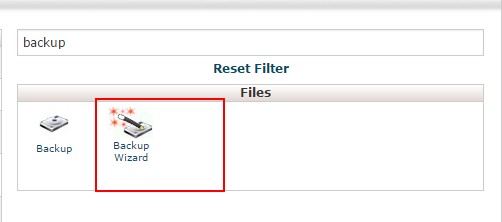
Step 9 – Now, it is time to also move your site’s database. Go back to your old host cPanel area then click the “Backup Wizard” icon.
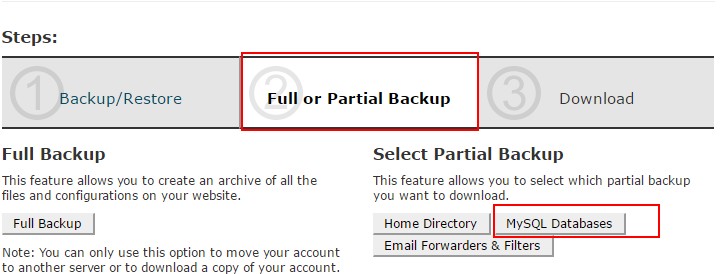
Next, click the “Backup” button.
Next, click the “MySQL Databases” option under “Select Partial Backup” section.
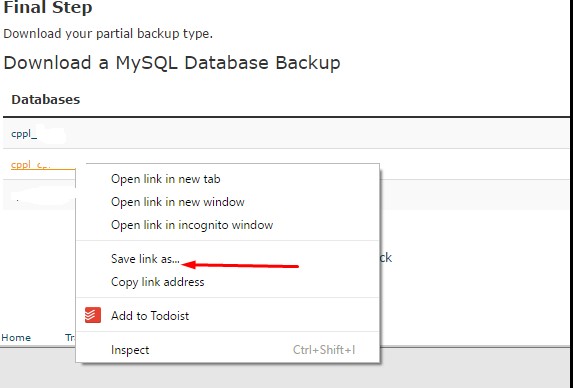
In the next page you’ll see all available MySQL database.Select your website database.
Next, right-click on the database link and copy that link / url (you may also paste it to notepad first).
Step 10 – Now go back to your SSH client. I assume you are still in “/var/www/domain.com/public_html or ” then issue following command:
wget --user=cpaneluser --password='cpanelpass' http://domain.com:2082/cpsessxxxxxxxx/getsqlbackup/
filename.sql.gz
Note:
- Change “cpaneluser” with the username of your old host cPanel username
- Change “cpanelpass” with cPanel password.
- Change “http://domain.com:2082/cpsessxxxxxxxx/getsqlbackup/filename.sql.gz” with database link copied in step 9 above.
Next, extract it using this command:
gzip -d filename.sql.zip
Once done, you should now get filename.sql
If you failed with this method, Alternatively you can simply download your database “.sql.gz” file to your computer, upload it again to your old host via File Manager, then transfer it to new server using wget command:
wget http://domain.com/filename.sql.gz
Step 11 – Next, lets import that .sql file to your server’s database. First, make sure you have created new MySQL database and MySQL user on your new server and grant all access for that user to the database. Once done, use this command:
mysql -u MYSQL_USER -p DATABASE_NAME < DATABASE_NAME.sql
Please replace:
- MYSQL_USER with your own MySQL username.
- DATABASE_NAME with the actual database name in your server you wish to use. You can simply create and use the same database name as your old host.
- DATABASE_NAME.sql with the .sql file transferred to your new server using step 10 above.
Step 12 – All the things are set up as above. next you have to simply edit your script to reflect new server settings including editing database name, user and password in your script (if you use different database name).
Alternative way to move files:
If you don’t want create a .zip file of your files in old host then transfer it to new server using “wget” command followed by unzipping it, there is also another way to migrate all your website file from cPanel to new server using ncftp method.
Run this command to install ncftp on your new server:
apt-get install ncftp
On CentOS or Fedora:
yum install ncftp
Once done, next, make sure you are in your server’s root document (public_html or htdocs), if not, go in there.
cd /var/www/domain.com/public_html
Once done, note down your old host ftp username and password. You can find it in cPanel via “FTP Accounts” menu.
Usually your cPanel username and password is also the same as your ftp account. Now go back to your SSH client and run this command:
wget -nc -r --no-parent ftp://ftp.domain.com/public_html --ftp-user=username --ftp-password=password
You can also use your IP:
wget -nc -r --no-parent ftp://123.123.123.123/public_html --ftp-user=username --ftp-password=password
change “username” with your own ftp username and “password” . Once done, issue that command in your new server. Wait till the process has finished as it can take few minutes and it depends on how many files you have.
Now you can issue “ls” command to see the files.
cd ftp.cpanelplesk.com
cd public_html
Then issue “ls” command again and you should now see all your files and folders there. Now you have to move all the files and folders to upper level, 2 levels actually,issue this command
mv * .[A-Za-z0-9]* /var/www/domain.com/public_html
Now your files and folders should be moved from inside “public_html” folder to your document root folder which is “/var/www/domain.com/htdocs or /public_html”.
Next, you can simply delete the “ftp.domain.com” folder using this command:
rmdir ftp.domain.com
However the directory name “ftp.domain.com” could be another name. replace that with your own. If the command above returns with error / could not remove the directory, that;s because the directory is not empty. Double-check it.
If everything’s just fine, you can then proceed to step 9 above to migrate your site’s database.
So now all your website moved from old host to new server. Next, Of course you have to change the NS entries of your domain with the servers’ IP. You can follow my tutorial about how to setup BIND DNS server, that record should be ns1.domain.com and ns2.domain.com. Otherwise you can use your domain registrar’s DNS manager and update its A record to your server.
That’s all to do,Please Give your opinion below if you experience any issues or to discuss your ideas and experiences.