
Hosting websites and applications on a dedicated server is a significant step that requires careful planning, especially when using Hetzner with cPanel. This guide provides a comprehensive outline of the essential steps, from server provisioning to cPanel installation, to help users manage domains, configure emails, and implement robust security measures. Activating Rescue Mode is crucial for troubleshooting and maintenance without disrupting the live system. Once you have set up your dedicated server, you can harness its full potential to create a reliable and efficient hosting environment for your online ventures. Follow this guide to ensure that your website or application is always running seamlessly.
Activating the Rescue System
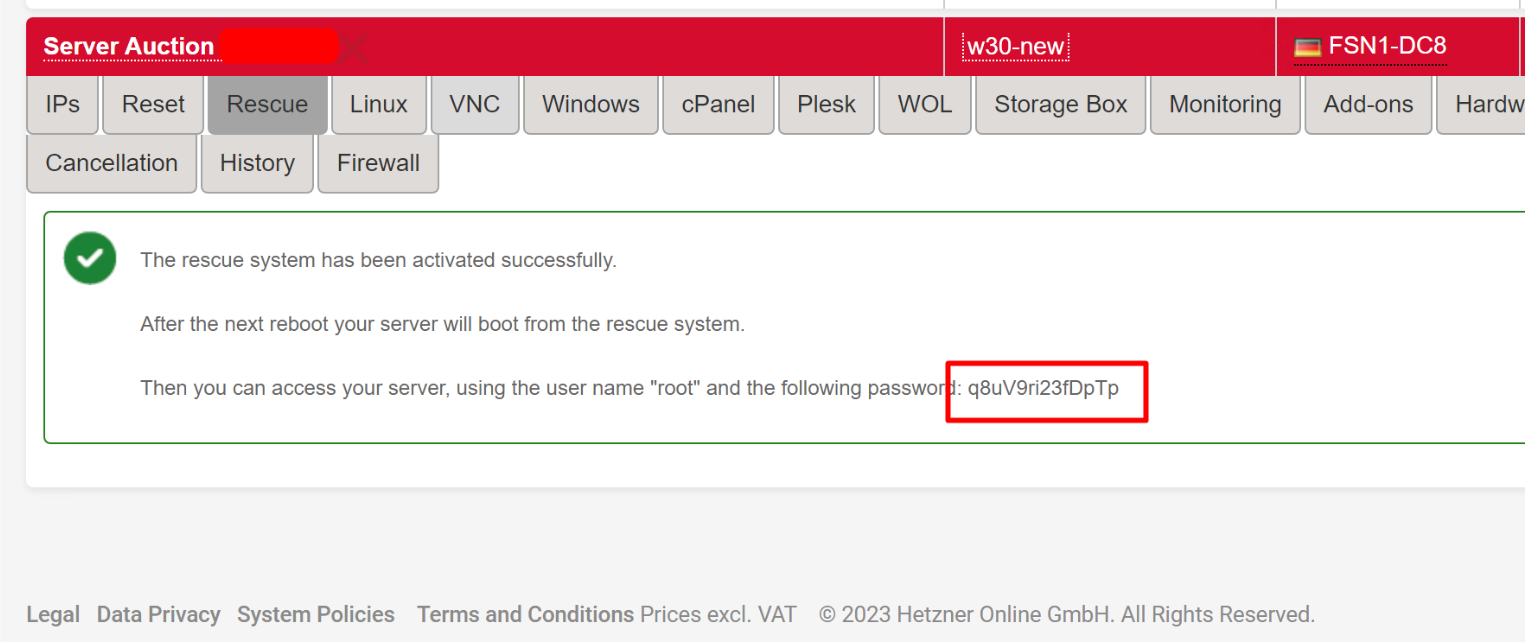
To start a server in the Rescue System, first, you need to activate it via the administration interface Robot. To do this, click on, select the correct server, and then open the tab Rescue. Then pick the correct type of architecture and activate it.

Now use the password that was given to you when you activated the Rescue System to log in as “root” via SSH. Or, if you have already uploaded an SSH key to Robot, you can select the key, and log into the Rescue System without a password.
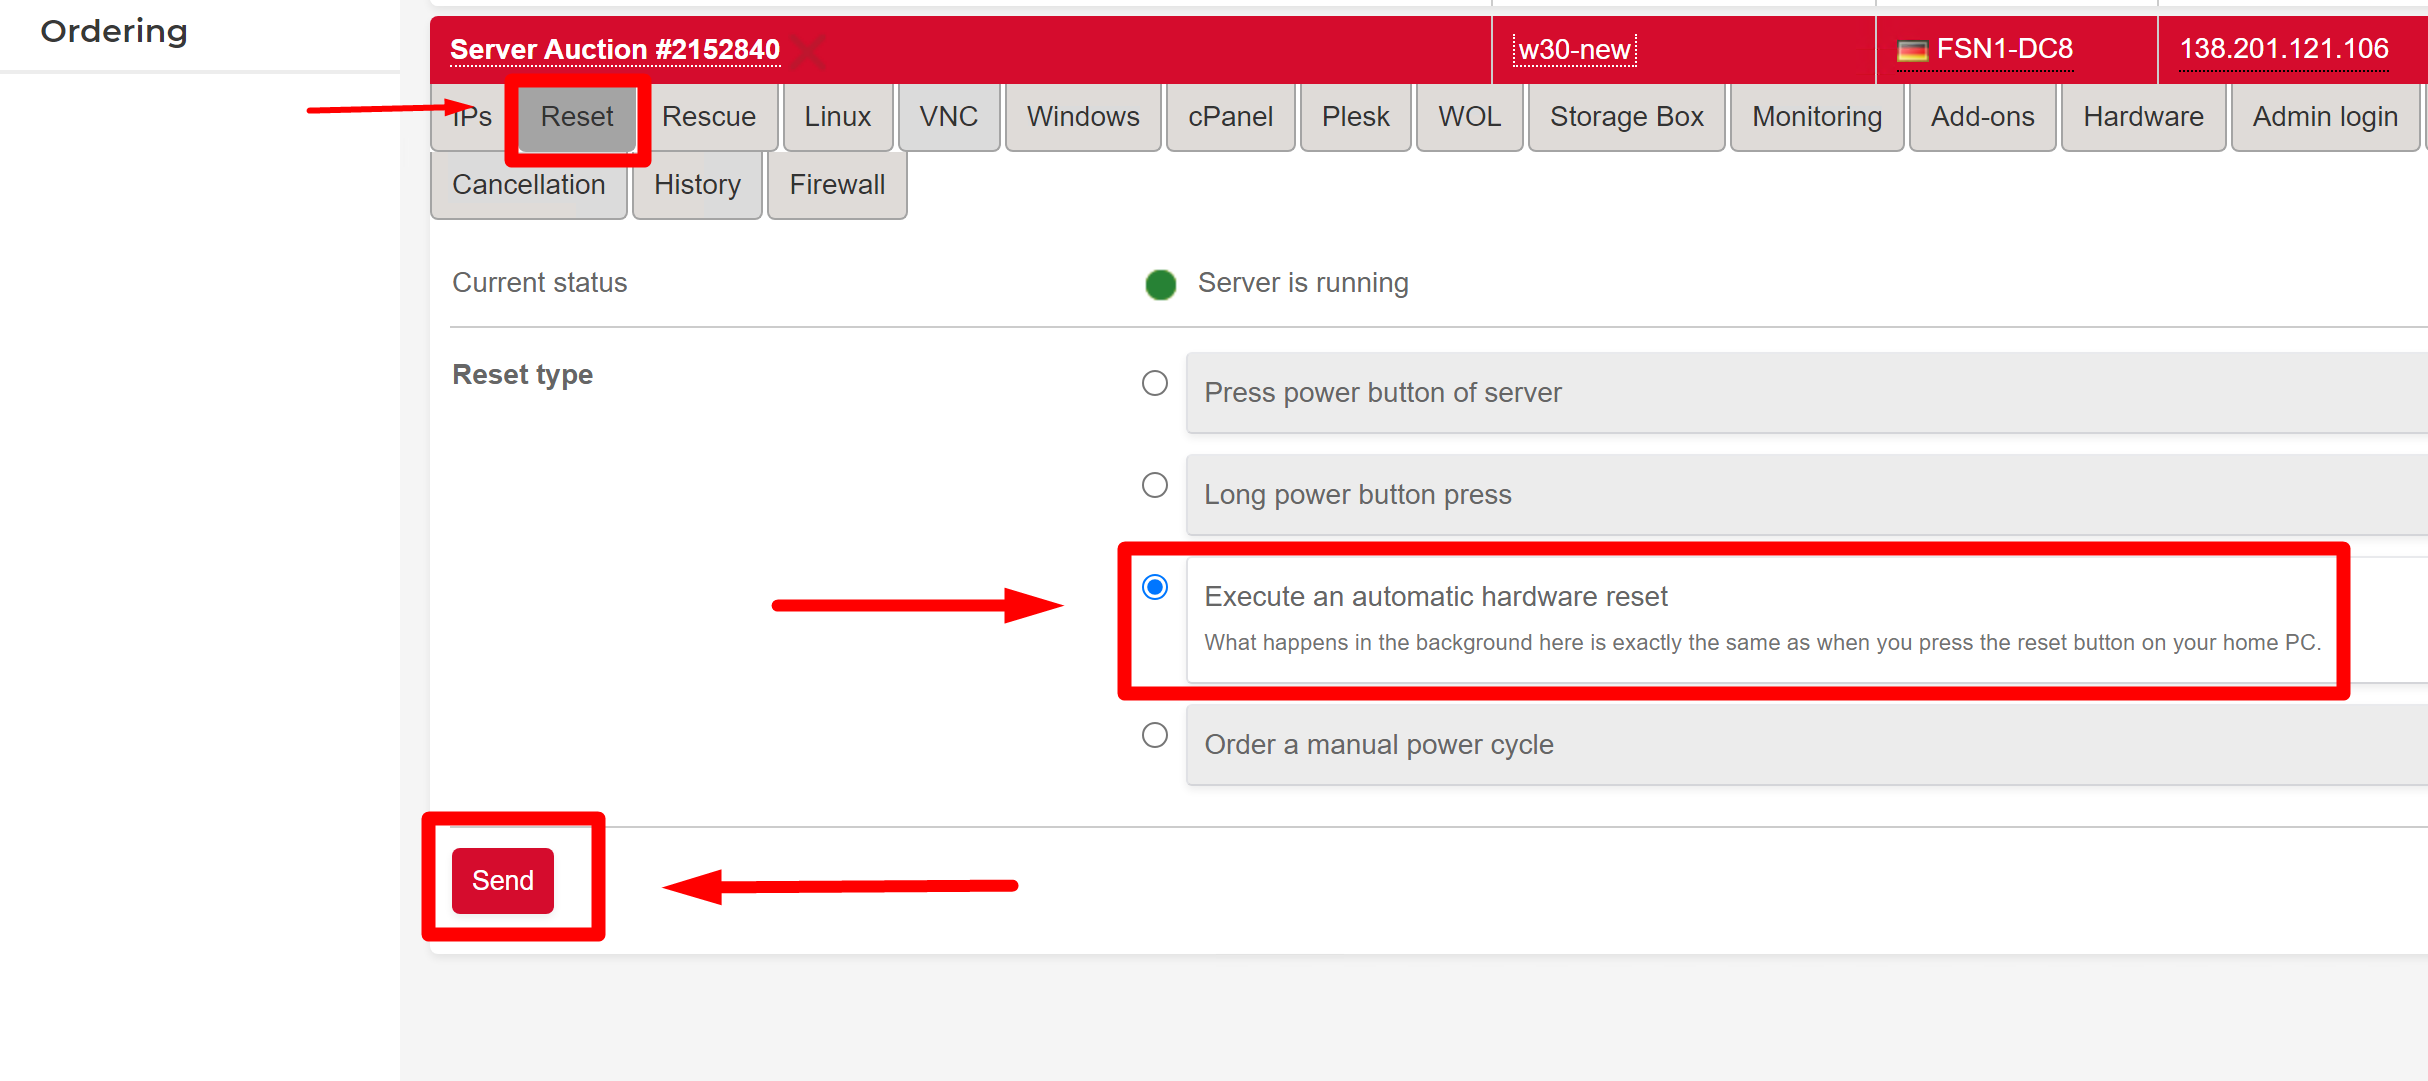
Restarting the server
To load the Rescue System, restart the server. If you can’t access it, use Robot’s reset function in the Reset tab.
Note: It’s only valid for one boot. If not used within 60 minutes, it deactivates.
Installing an operating system
Hetzner provides a convenient menu-based script called Installimage for installing an operating system and for customizing settings like drives you want to use, RAID levels, hostname, partitions, and LVM.
Run the installimage Command:
- Type
installimageand press Enter. - Select the Image:
- You will be presented with a list of available images. Choose the image you want to install and press Enter
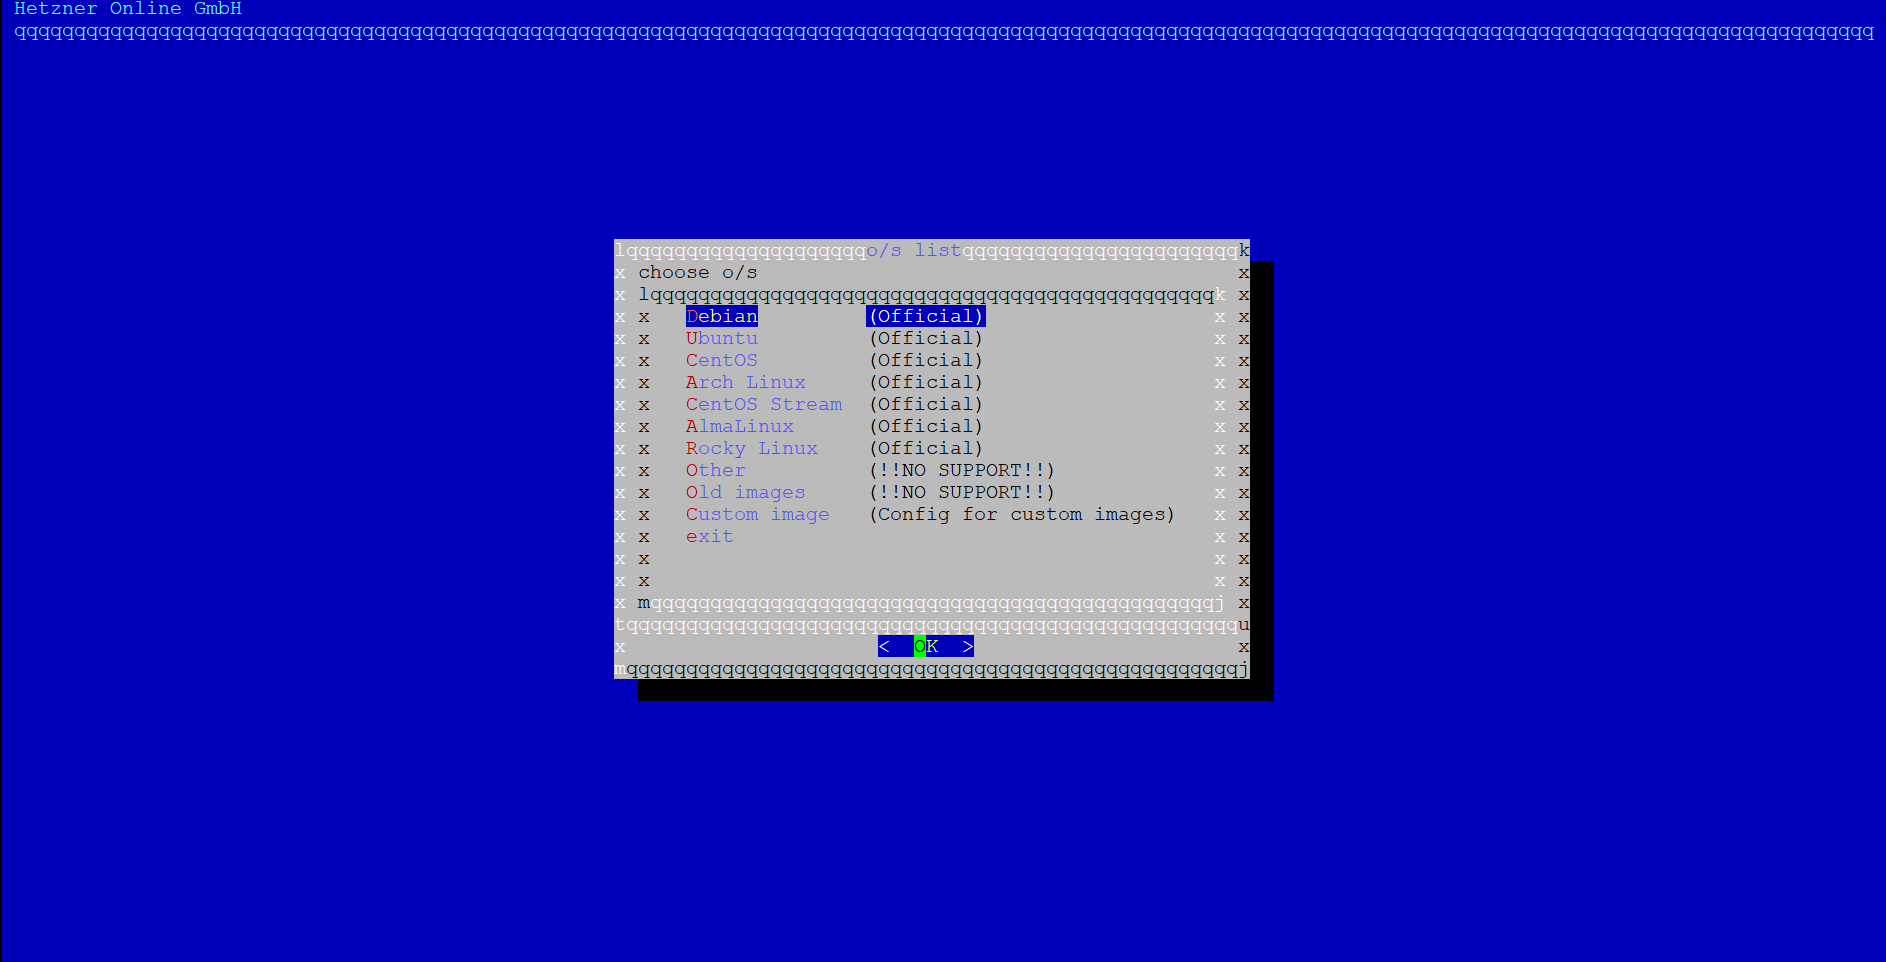
Select the Version:
- After choosing the image, you may be prompted to select a version if there are multiple versions available for that image. Use the arrow keys to navigate and press Enter to select the version.
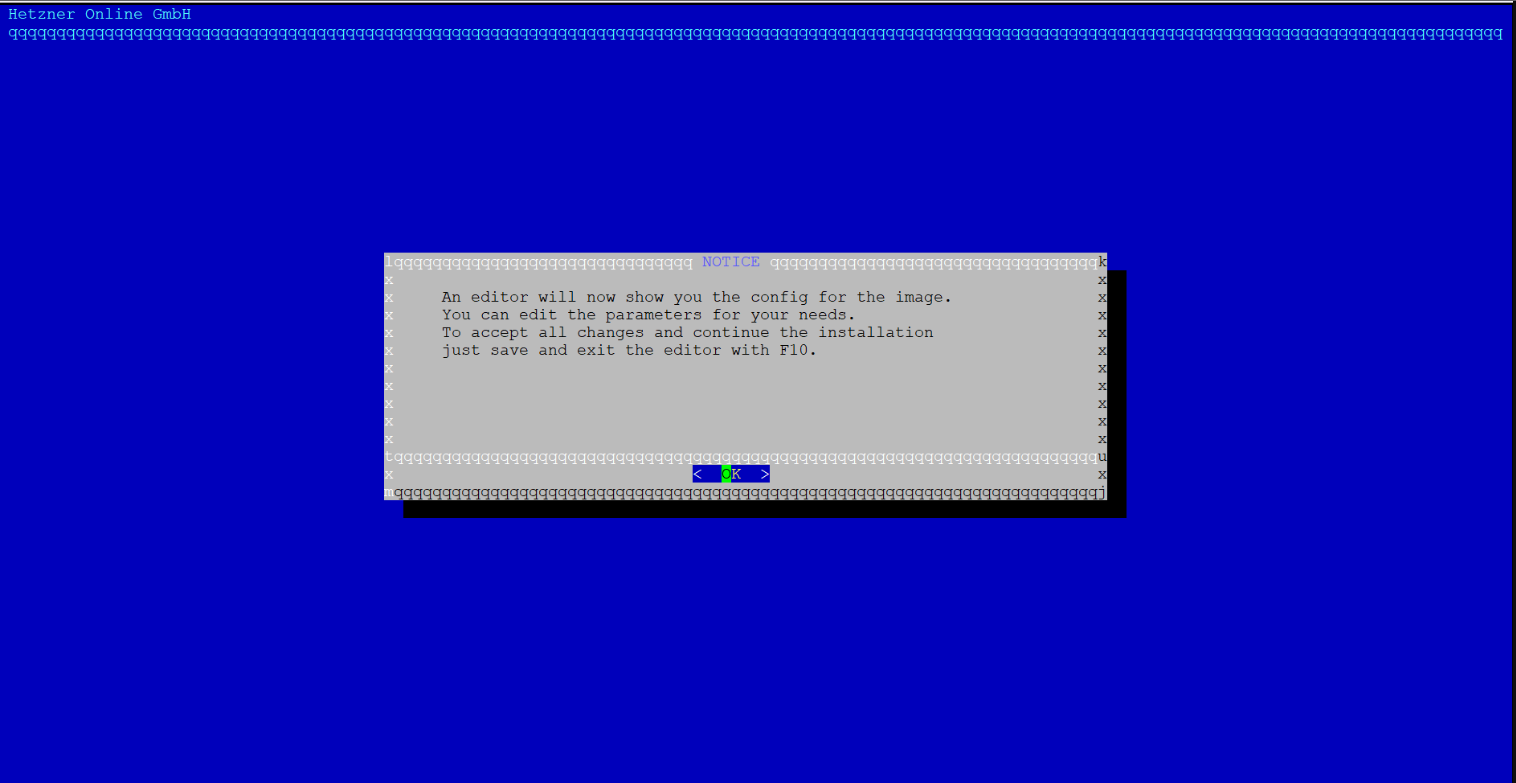
Raid configuration or disk partitions
- you can make raid configuration or disk partitions you can do this in this step do your changes then hit f10 to save them and proceed to installation.
Confirm Installation:
- You may see a confirmation message about overwriting existing data. Confirm by typing
yesand press Enter. - Partitioning and Formatting:
- The installer will ask you to choose a partitioning scheme. You may select a predefined scheme or choose to create custom partitions.
- Select Disk:
- If you have multiple disks, you will be asked to choose the disk where you want to install the image. Use the arrow keys to select and press Enter.
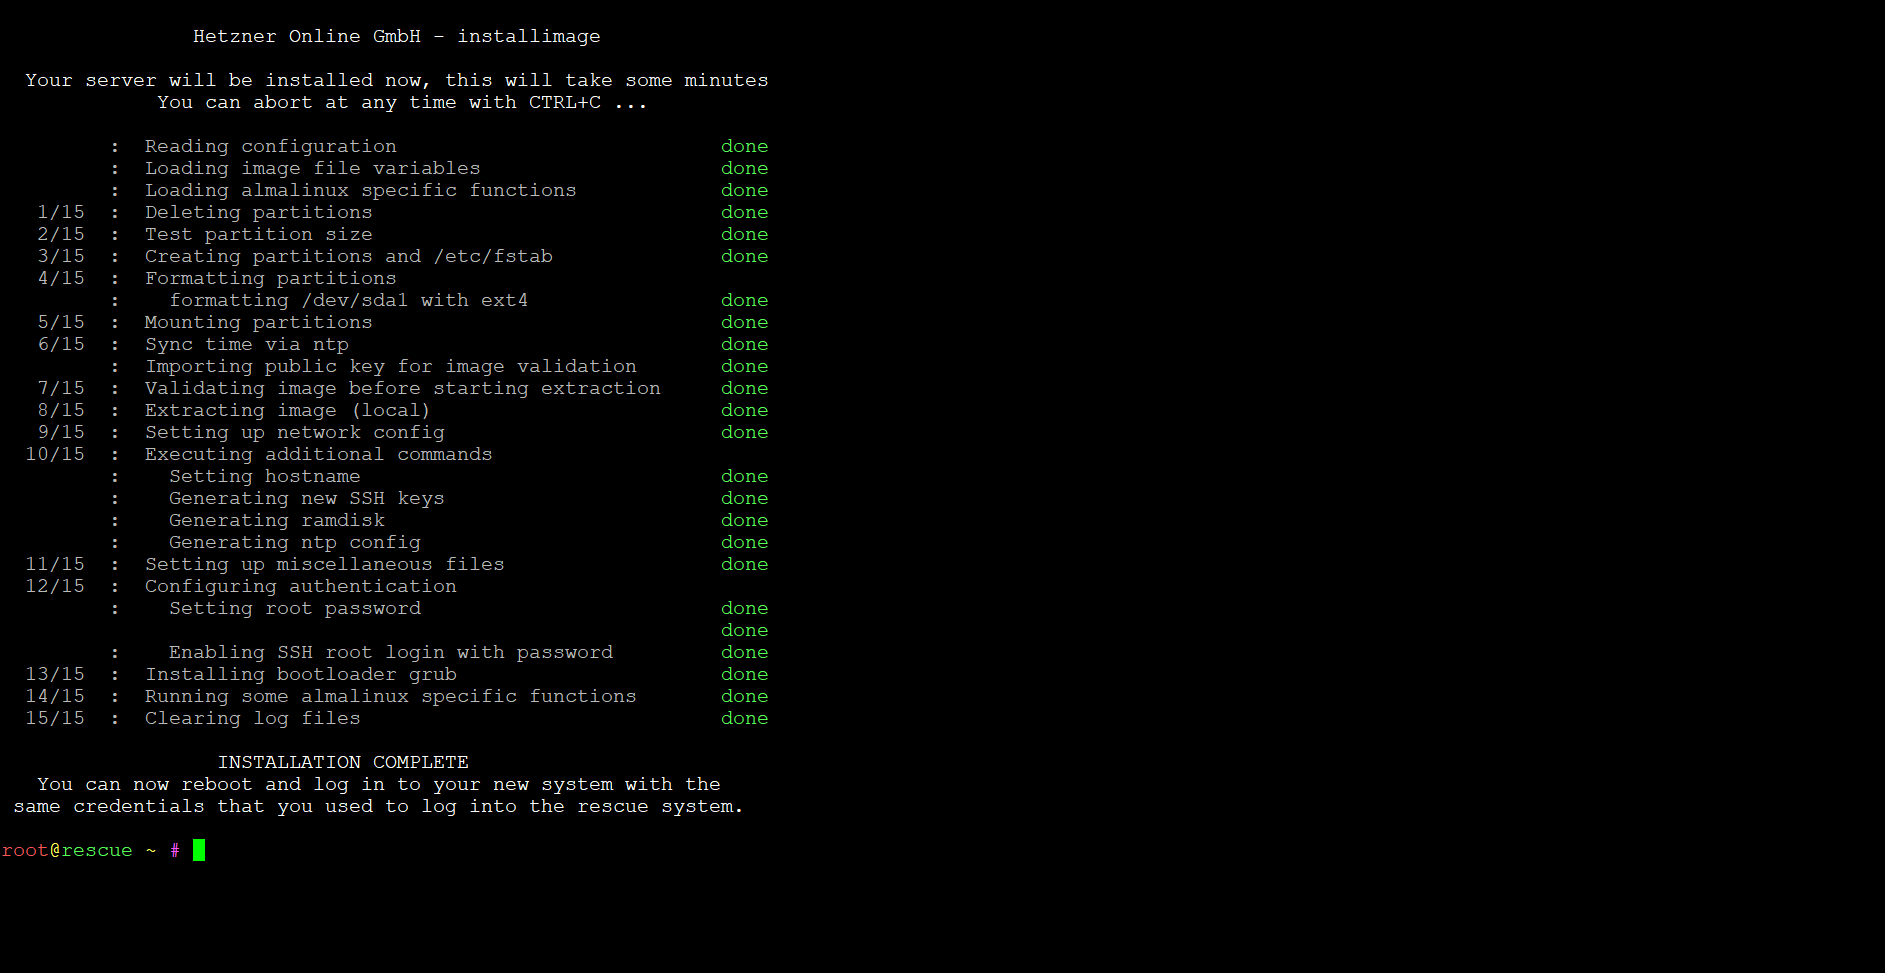
- Wait for Installation:
- The installer will now format the selected disk and install the chosen image. This process may take some time.
- Post-Installation Setup:
- Once the installation is complete, you may need to perform additional configuration tasks depending on the specific requirements of the image you installed.
- Reboot:
- After the installation is complete and any necessary configurations are done, it’s a good practice to reboot the server.
Congratulations! You have successfully installed the image using the installimage command. If you have any specific questions or encounter any issues during this process, feel free to ask for further assistance.
Accessing the Server:
Once the server is set up, you will receive an email with login details.
Use an SSH client (like PuTTY for Windows or Terminal for macOS/Linux) to connect to your server.
Updating and Securing the Server:
Update the system packages to the latest versions using the package manager (apt for Ubuntu/Debian or yum for CentOS/RHEL).
Configure a firewall (like UFW or iptables) to secure the server. Allow only necessary ports like 22 (SSH), 80 (HTTP), and 443 (HTTPS).
Installing cPanel:
For cPanel installation. Use the following command:
cd /home && curl -o latest -L https://securedownloads.cpanel.net/latest && sh latest
This script will initiate the cPanel installation process After completion, you can set up the default settings. Additionally, you can take a trial period to test out the service.