Keep in mind that if you alter the name of a database, you’ll need to update user permissions and any scripts that reference it.
NOTE: If you want the same database user to have access to the renamed database, make a note of the database’s current username, which may or may not be the same as the current database’s name.
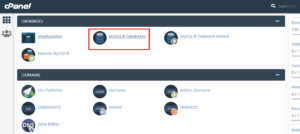
- In cPanel, click on MySQL Databases.
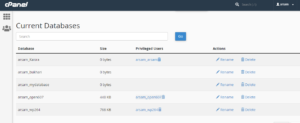
- Scroll down the page to the Current Databases section.
- Locate the database you’re about to rename and make a note of or recall the database user who has already been allocated to it. This is something you’ll need to know.
- To get started, go back to the cPanel main page.
Step 1: Renaming the Database
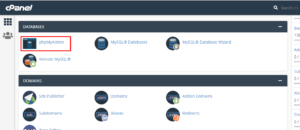
- Click on phpMyAdmin in cPanel. (It should take you to a new tab)
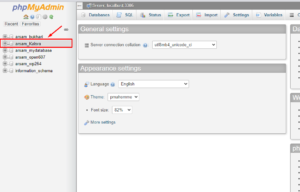
- In the left-hand column, select the database you want to rename.
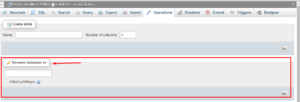
- Now, click on the Operations tab.
- Where you find “Rename database to:” enter the new database name.
- To begin, press the Go button.
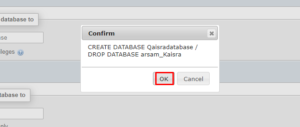
- When it asks if you want to create a new database and delete the old one, select OK to continue. (Now is a good opportunity to double-check that the new name is spelled correctly.)
Step 2: Reconfiguring User Permissions
If your hosting package includes cPanel, you’ll have to change user rights.
- Return to the cPanel home page.
- Go to MySQL Databases and choose it.
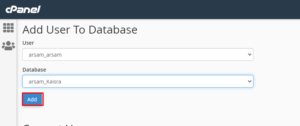
- Scroll to the bottom of the page to the Add User To Database section.
- Choose a database from the drop-down menu (should be the new name).
- Choose a database user from the drop-down menu (the same one that used to be associated with this database).
- Select the Add button.
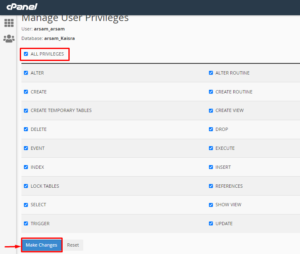
- Check the box next to All Privileges on the Manage User Privileges screen that opens.
- Click on the Make Changes button.
Step 3: Update Scripts
If you want any scripts or programs that reference this database to continue to work, you may need to update them because the name has changed.

