
Drupal is famous Content Management Framework (CMF) published in PHP. It has been commonly used for personal such as blogging to professional website. Drupal also allows users to arrange, post and handle number of content on website like WordPress & Joomla. It’s easily available to download and use.
Drupal operates on a web server like Apache, IIS, Lighttpd, Nginx and store contents at backend in databases like MySQL, MongoDB, MariaDB, PostgreSQL, SQLite, MS SQL Server. In this post, we will see how to do a manual installation of latest Drupal version on RHEL, CentOS and Fedora using LAMP setup.
PREREQUISITES
- A SSH client like Putty and basic knowledge about to use it.
- Basic knowledge about common Linux commands
- A CentOS server or VPS
- About 30 minutes of your time with a cup of coffee or tea.
LAMP Stack
LAMP stack is an open source web development software used to run web application.Please follow below link to setup LAMP stack.
How to install LAMP (Linux, Apache, MySQL, PHP On CentOS)
Install Drupal 7.22 on RHEL, CentOS & Fedora
These installation steps guide you how to install latest Drupal 7.22 using LAMP setup on RHEL, CentOS and Fedora.
Step 1: Download Drupal 7.22
Go to the directory where you want to install the Drupal. By default server’s document root will be “/var/www/html“. Download Drupal using wget command.
wget http://ftp.drupal.org/files/projects/drupal-7.22.tar.gz
Step 2: Extract Compressed Drupal
Extract Drupal package which will create drupal-7.22 directory. once done , remove compressed version of Drupal.
tar -zxvf drupal-7.22.tar.gz
You may remove source file and change ownership of directory:
chown -R apache:apache /var/www/drupal
Step 3: Apache Configuration
Open Apache configuration file with your favorite editor.
nano /etc/httpd/conf/httpd.conf
Search section as below and change it with your details.
ServerAdmin admin@cpanelplesk.com
ServerName drupal.cpanelplesk:80
Step 4: Restart Apache
Restart Apache service.
service httpd restart
To make httpd service started automatically on server boot, do the following:
chkconfig --level 35 httpd on
Verify your httpd is running and listening request on port 80
netstat -antp | grep httpd
tcp 0 0 :::80 :::* LISTEN 1705/httpd
Step 5: Create the settings.php file
Make a copy of drupal configuration file ‘sites/default/default.settings.php’. Copy default file and re-name it to ‘settings.php‘.
cp sites/default/default.settings.php sites/default/settings.php
Note: Don’t delete or rename default ‘default.settings.php‘ file as Drupal installer requires both files.
Now change the permissions of “settings.php” file and “default” directory to make them writeable:
chmod a+w sites/default/settings.php
chmod a+w sites/default/
Note: Change permissions back once you have run the installation script. Permissions should be as.
chmod 644 settings.php
chmod 755 ../default
Step 6: Create the MySQL Database
Set root password for MySQL login and creat database using below commands.
mysqladmin -u root password 'redhat'
Login with root password in MySQL.
mysql -u root -p
Create database called “drupal” in MySQL.
mysql> create database drupal;
Query OK, 1 row affected (0.05 sec)
Grant privileges on “drupal” database for “drupal” user in MySQL.
mysql> grant all on drupal.* to drupal@'localhost'
identified by 'redhat';
Query OK, 0 rows affected (0.22 sec)
mysql> flush privileges;
Query OK, 0 rows affected (0.00 sec)
Restart MySQL Service.
service mysqld status
service mysqld restart
chkconfig --level 35 mysqld on
Step 7: Iptables (Firewall) Configuration
Please open port 80 on firewall or disable iptables.
iptables -A INPUT -p tcp --dport 80 -j ACCEPT
service iptables save
service iptables restart
Step 8: Installation and Configuration of Drupal
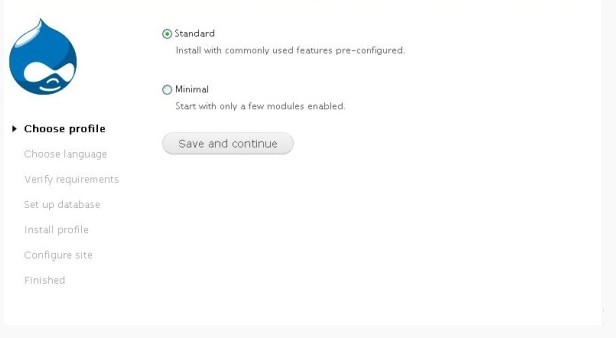
Open Browser and type “http://drupal.cpanelplesk.com” which will open drupal screen to configure Drupal. Select ‘Standard‘, click on Save and Continue.
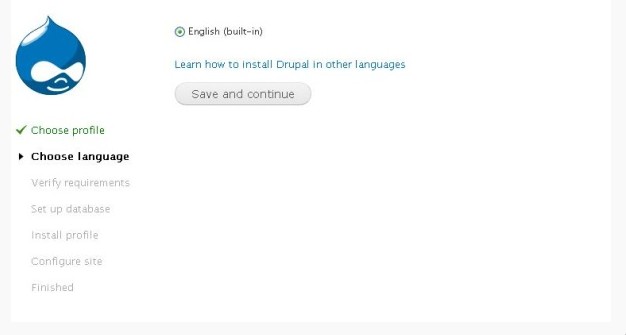
Step 9: Choose language
Choose language, click on save and continue.
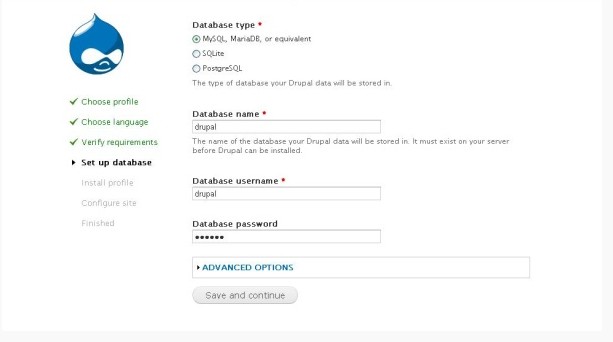
Step 10: Database Configuration
Now it’s for the details like database name, username and password which was set earlier in “Step 6:” and click on Save and Continue.
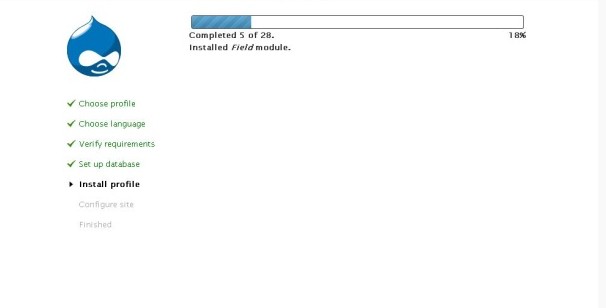
Step 11: Installing Drupal
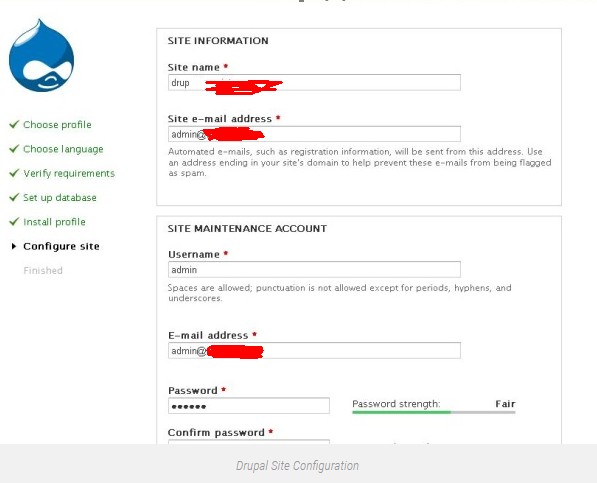
Step 12: Site Configuration
Fill up the details like Site name, Site e-mail address, Site Maintenance UserID and Password etc.
Drupal installation will be completed, Now Login to Drupal Site Dashboard.
That’s all you have to do, also give your opinion below if you experience any issues or to discuss your ideas and experiences.