WordPress now a days is the most popular content management system and first choice blogging platform for beginners.Using WordPress is usually a simple experience but sometimes little irritating issues can spend your valuable time.
Some users on the WordPress community have revealed an issue that occurs when they are trying to publish pictures or other files to their site. The error states ‘Upload: Failed to write file to disk’ Now, these errors don’t give much idea to the user as to why they are appearing and what’s the solution to this problem and can be furstrating for the beginner users . So let’s see in this article how to fix “Upload: failed to write file to disk” error in WordPress.
Causes of Failed To Write File To Disk Error in WordPress
This error can occur because of several reasons,We can summarize all those reasons under three common points and hopefully by the end of this article, you would be able to fix this error.
- Permissions setting to the upload directory.
- The user exceeds the granted quota or hard drive of the server has no space left.
- The tmp folder of the server has no space left.
Fix Upload Failed to Write to Disk Error in WordPress
First, connect to your WordPress site using a FTP client.
For this tutorial, I am using the free FileZilla FTP client. If you are using some other FTP client, then it might look a little different.
Check your ‘Upload’ folder permission
Once you are connected, you need to right click on the wp-content folder and select file permissions. Normally, this folder should have 755 permission, and if this is not the case, then change it to 755 right now. This is because WordPress needs access to write files in your wp-content/uploads directory to enable certain functions, and if this permission is not set correctly, then you will not be able upload media to your WordPress site.
You also need to make sure that file permissions for individual files in your wp-content folder are correct.Once again, right click on wp-content folder and select file permissions. This time we will change permissions for files.
Enter 644 in the numeric value and then check the box next to ‘Recurse into sub-directories’.
Lastly, you need to click on ‘Apply to files only’ option.
Click on the OK button to continue. Your FTP client will now set file permissions to 644 for all files in wp-content folder.
You can now open your WordPress site and retry uploading files.
Exceeding your storage quota
It’s a bit strange but users can get this error if they are exceeding their storage quota. Users on webhosts with shared hosting plans get packages with very low storage space, such as 500MB, 1GB, 2GB. If you are the one who is hosting multiple WordPress sites and upload lots of pictures then chances are that even 1GB storage will soon become full. If the storage quota is exceeding, then your web host won’t allow you to upload any other files, and this error occurs.
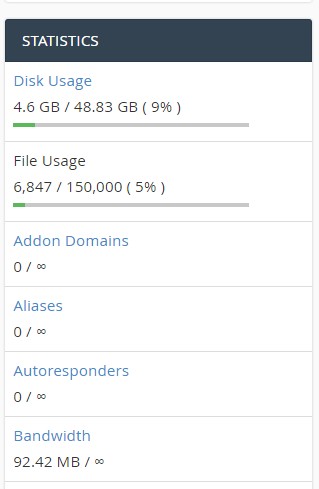
To check your allocated space, Login to your cPanel and check the left sidebar. Notice the “Disk space usage” field, which will inform you how much disk space you are using, and your total space as per your hosting plan. If you are exceeding then it’s time to upgrade to a better plan, or delete files in your account that you do not require.
Clear temporary folder of the server
Sometimes this issue occurs if the temporary directory where PHP stores the newly uploaded file is full or is poorly configured. This temporary folder is located on your server and in most cases you cannot access it using FTP. You will need to contact your web host and ask them to empty it for you.
We hope this article helped you to resolve ‘Upload: Failed to Write File to Disk’ Error in WordPress. Please check and give your opinion below if you experience any issues or to discuss your ideas and experiences. You may also want to see our guide on how to fix common image issues in WordPress.


