

In this article I will explain how to install and setup DNS server inside your operating system to manage your domains.
So here i assume that you already know how to setup a working Ubuntu server and install MySQL on a server based on Ubuntu.
First login to your server via SSH connection.
Then enter your root password.
Step:1.INSTALL BIND9
Type this command then hit enter:
apt-get install bind9
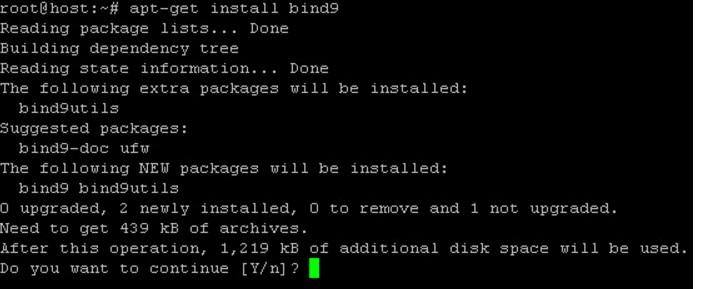
Once done you’ll see a message saying:
* Starting domain name service... bind9 [OK]
STEP 2. BASIC CONFIGURATION
So you have successfully installed BIND9 on your server. Now i will show you a basic configuration how to setup your domain to resolve to your server. Here’s what I did. Run following command then hit Enter on your keyboard:
nano /etc/bind/named.conf.local
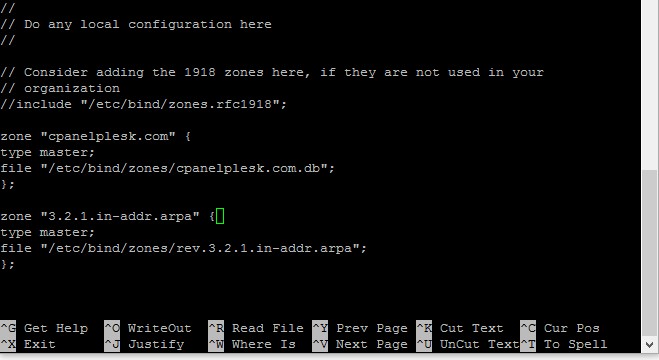
Now Copy-paste below command into your favorite text editor like Notepad, Text-pad.
zone "domain.com" {
type master;
file "/etc/bind/zones/domain.com.db";
};

zone "3.2.1.in-addr.arpa" {
type master;
file "/etc/bind/zones/rev.3.2.1.in-addr.arpa";
Here in this post am using my own domain name for all commands,You’ll need to replace “domain.com” with your own domain name and corresponding TLD. Also, you have to replace xxx.xxx.xxx.xxx and rev.3.2.1 with IP address of your server.
Once you’ve changed the necessary values, you can paste it into Nano editor. You can also easily type above command syntax to Nano editor screen while replacing necessary values during your typing.
Save the file then hit Control+X to exit Nano editor.
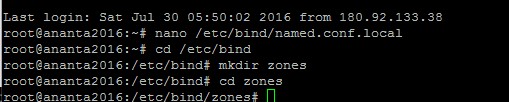
Now go to bind directory to make other things. Type this command:
cd /etc/bind
Create new directory called “zones” inside this by using this command:
mkdir zones
Now enter into that directory as well.
cd zones
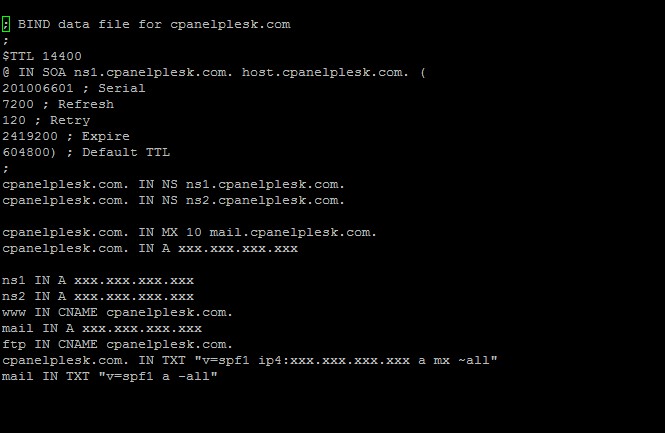
Then create new file called “yourdomainname.com.db“. Type this command:
nano cpanelplesk.com.db
At this part you’ll also need to replace “domain.com” with your own domain name.
That command open Nano editor screen once again. Next, you can either copy these syntax to Notepad and edit it or simply type it in Nano editor directly:
; BIND data file for domain.com
;
$TTL 14400
@ IN SOA ns1.domain.com. host.domain.com. (
201006601 ; Serial
7200 ; Refresh
120 ; Retry
2419200 ; Expire
604800) ; Default TTL
;
domain.com. IN NS ns1.domain.com.
domain.com. IN NS ns2.domain.com.

domain.com. IN MX 10 mail.domain.com.
domain.com. IN A xxx.xxx.xxx.xxx

ns1 IN A xxx.xxx.xxx.xxx
ns2 IN A xxx.xxx.xxx.xxx
www IN CNAME domain.com.
mail IN A xxx.xxx.xxx.xxx
ftp IN CNAME domain.com.
domain.com. IN TXT "v=spf1 ip4:xxx.xxx.xxx.xxx a mx ~all"
mail IN TXT "v=spf1 a -all"
If you have two IPs, you can replace “ns1 and ns2 IN A xxx.xxx.xxx.xxx” with your IP addresses. Otherwise simply you can use the one IP.
Once done editing Hit control+O to save file then hit control+X to exit the nano editor.
Now it’s time to define reverse DNS lookup. If you are not familiar? Don’t worry simply follow my steps. Type this command syntax:
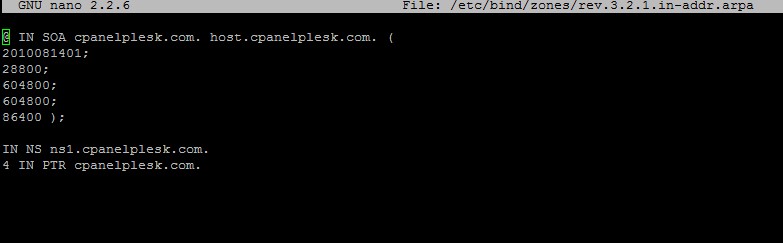
nano /etc/bind/zones/rev.3.2.1.in-addr.arpa
Don’t forget to replace rev.3.2.1 with your server IP.
Add following lines inside that file:
@ IN SOA domain.com. host.domain.com. (
2010081401;
28800;
604800;
604800;
86400 );

IN NS ns1.domain.com.
4 IN PTR domain.com.
Replace “host.domain.com” with your own server’s host name. Once done, press Control+O to save then Control+X to exit.
There is another file you have to edit. Run this command:
nano /etc/resolv.conf
Now add following line at the top of any lines you see there:
search domain.com

Once done, press Control+O to save followed by Control+X to exit the editor. That is it. But to make sure that all recent changes implemented, you better restart Bind9 service using this command:
/etc/init.d/bind9 restart
STEP 3. CHANGE NAMESERVER IN YOUR DOMAIN REGISTRAR
I will not describe this last phase because the way it can be done is really differ. This will depend on which domain registrar you purchased the domain from. E.g: GoDaddy, NameCheap,and so on.
The key factor is to add ns1.domain.com and ns2.domain.com there. Once done, delay for about 24 hours for your domain to resolve to your web server but sometimes it is quicker and done within couple of hours.
You can validate it quickly by checking your domain name via web browser.
STEP 4. TEST YOUR DNS
In this case you have to install additional tool called “DNS Utility”. To install it follow the steps below:
apt-get install dnsutils
Once the install process finished, run following command:
dig domain.com
Done.